Welcome back guys. Let’s resume my last post which was Making Game using SDL: Part – 1. We discussed the variables of Graphics class. Now let’s see what functions we have used.
Graphics() Constructor:
Graphics::Graphics(){

 SDL_Init( SDL_INIT_EVERYTHING );

    //Set up the screen

    this->screen = SDL_SetVideoMode( SCREEN_WIDTH, SCREEN_HEIGHT, SCREEN_BPP, SDL_SWSURFACE );

    //Initialize SDL_ttf

    TTF_Init();

    //Set the window caption

    SDL_WM_SetCaption( "rCricket2013", NULL );

 this->textColor.b = 255; this->textColor.g = 255; this->textColor.r = 255;

}
In constructor we will initialize everything to create a screen. To use SDL, we need to first call SDL_Init(). Then what we are doing is setting up properties for a screen. We are passing the values of SCREEN_WIDTH, SCREEN_HEIGHT, SCREEN_BPP from our global values and SDL_SWSURFACE from default SDL value. You must remember that I mentioned in my previous post that everything that has SDL_ prefix is actually comming from the SDL library. So, in this case, value of SDL_SWSURFACE is also defined in SDL library.
Next, we are initializing True Type Font (TTF) by calling TTF_Init() , Since, beside graphics, we want to use Textual representation in our game. In line 8 we are setting up caption for the window and in my case I put the name of my game. At line number 9, we are setting up default font color.
load_image():
SDL_Surface *Graphics::load_image( string filename )

{

 //The image that's loaded

 SDL_Surface* loadedImage = NULL;
//The optimized surface that will be used
SDL_Surface* optimizedImage = NULL;
//Load the image
loadedImage = IMG_Load( filename.c_str() );
//If the image loaded
if( loadedImage != NULL )
{
//Create an optimized surface
optimizedImage = SDL_DisplayFormat( loadedImage );
//Free the old surface
SDL_FreeSurface( loadedImage );
//If the surface was optimized
if( optimizedImage != NULL )
{
//Color key surface
//Reference : http://www.colorhexa.com/ca18df
SDL_SetColorKey( optimizedImage, SDL_SRCCOLORKEY, SDL_MapRGB( optimizedImage->format, 0xca, 0x18, 0xdf ) );
}
}
//Return the optimized surface
return optimizedImage;
}
In this function we are passing an image file and after necessary modification we are returning it. We need to do this modification to make the image compatible for our screen. I hope, if you read the comments in the code and try to do some research on each of the function and strategy we used here by reading the documentation, you will understand it.
apply_surface():
void Graphics::apply_surface( int x, int y, SDL_Surface* source, SDL_Surface* destination, SDL_Rect* clip){

    //Holds offsets

    SDL_Rect offset;
//Get offsets
offset.x = x;
offset.y = y;
//Blit
SDL_BlitSurface( source, clip, destination, &offset );
}
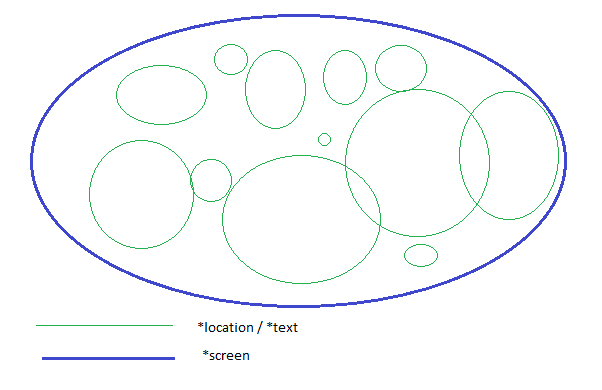
This may be bit complex to understand. What we are trying to do here, take the x and y co-ordinate of screen then just put the source surface on screen. This is pretty much of it. But if you want to know what’s going on in the back, here it is: we take a single surface as source. It can be *location or *text. and then we put it to our destination surface. Most of the time which is *screen. I think you remember what I said about *screen, *location and *text.
~Graphics() destructor:
Graphics::~Graphics(){

 //Freeing Surface

 for(int i = 0; i location_flag; i++){

 if(this->screenBackgrounds[i].location){

 SDL_FreeSurface(this->screenBackgrounds[i].location);

 }

 }

 for(int i = 0; i text_flag; i++){

 if(this->screenMessages[i].text){

 SDL_FreeSurface(this->screenMessages[i].text);

 }

 }

}
In destructor, we will free the surface so that we don’t need to free it explicitly. You know, we stored the backgrounds and Texts in two different array. So, we are running two different loops to take each one of those and free them up. Here we run the loop 0 to the the flag that mention the top of the array. It’s because we don’t need to free the full array. We are freeing each surface by calling SDL_FreeSurface() function.
Screen Class
Now, let’s talk about Screen class. Screen class will be used to generate a screen. Important thing is, it’ll be inherited from the class Graphics. We actually won’t use properties of Graphics class directly. We will use it only in Screen class. Let’s see the class definition.
class Screen :

 public Graphics

{

public:

 //The font that's going to be used

 TTF_Font *font;
Screen(string, int);
bool load_background( int x = 0, int y = 0, string location = "resources/background.png");
bool load_message(int x = 0, int y = 0, string text = "" );
bool trigger_surface();
};
Here, we see only one pointer variable of type TTF_Font. If you are thinking that this pointer will point the textual properties of a screen, you are absolutely correct. Let’s take a look at the functions.
Screen() constructor:
Screen::Screen(string font_file = "resources/BuxtonSketch.ttf", int font_size = 20){

 for(int i = 0; i screenBackgrounds[i].location = NULL;

 this->screenMessages[i].text = NULL;

 }

 this->location_flag = 0;

 this->text_flag = 0;

 this->font = TTF_OpenFont( font_file.c_str(), font_size );

}
Here we are preparing the arrays that we described in Graphics class by putting NULL value for location. Also we are initializing flag by point it to the index number 0. and at last we are initializing *font that we described earlier by using the values from arguments. First argument is indicating the font file and second pointer is defining size of the text in pixel.
load_background() & load_message():
bool Screen::load_background( int x , int y , string location , int w , int h ){

    //Load the background image

 this->screenBackgrounds[this->location_flag].location = this->load_image( location.c_str());

 this->screenBackgrounds[this->location_flag].location_x = x;

 this->screenBackgrounds[this->location_flag].location_y = y;

 this->location_flag++;

    return true;

}
bool Screen::load_message( int x , int y , string text , int w , int h ){
//Load the background image
this->screenMessages[this->text_flag].text = TTF_RenderText_Solid( this->font, text.c_str(), this->textColor );
this->screenMessages[this->text_flag].text_x = x;
this->screenMessages[this->text_flag].text_y = y;
this->text_flag++;
return true;
}
Both of these are pretty much same. 1st one is loading or putting an image to the screenBackgrounds array and 2nd one is loading or putting text in screenMessages array. we are also increasing flag value by one. We are using the optimized image that we get from the load_image() function of Graphics class to save it in *location.
trigger_screen():
bool Screen::trigger_surface(){

 for(int i = 0; i location_flag; i++){

 if(this->screenBackgrounds[i].location != NULL){

 this->apply_surface(this->screenBackgrounds[i].location_x, this->screenBackgrounds[i].location_y, this->screenBackgrounds[i].location, this->screen, NULL );

 }

 }

 for(int i = 0; i text_flag; i++){

 if(this->screenMessages[i].text != NULL){

 this->apply_surface(this->screenMessages[i].text_x, this->screenMessages[i].text_y, this->screenMessages[i].text, this->screen,  NULL );

 }

 }
SDL_Flip( this->screen );
return true;
}
This function will just loop through those two array and trigger/apply it by using the app_surface function defined in Graphics class.
So, that’s all of Screen class. In our next part we will start constructing our game. Till now we just configured necessary functions to create screens and graphics. We will start implementing these in our next part. Before that, try to understand what these functions and variables will do. Hope, you will be clear when you see the implementation. Thanks you all. Bye bye…